Tuesday, 28 February 2012

Simple Vanilla Cupcakes with Vanilla Buttercream

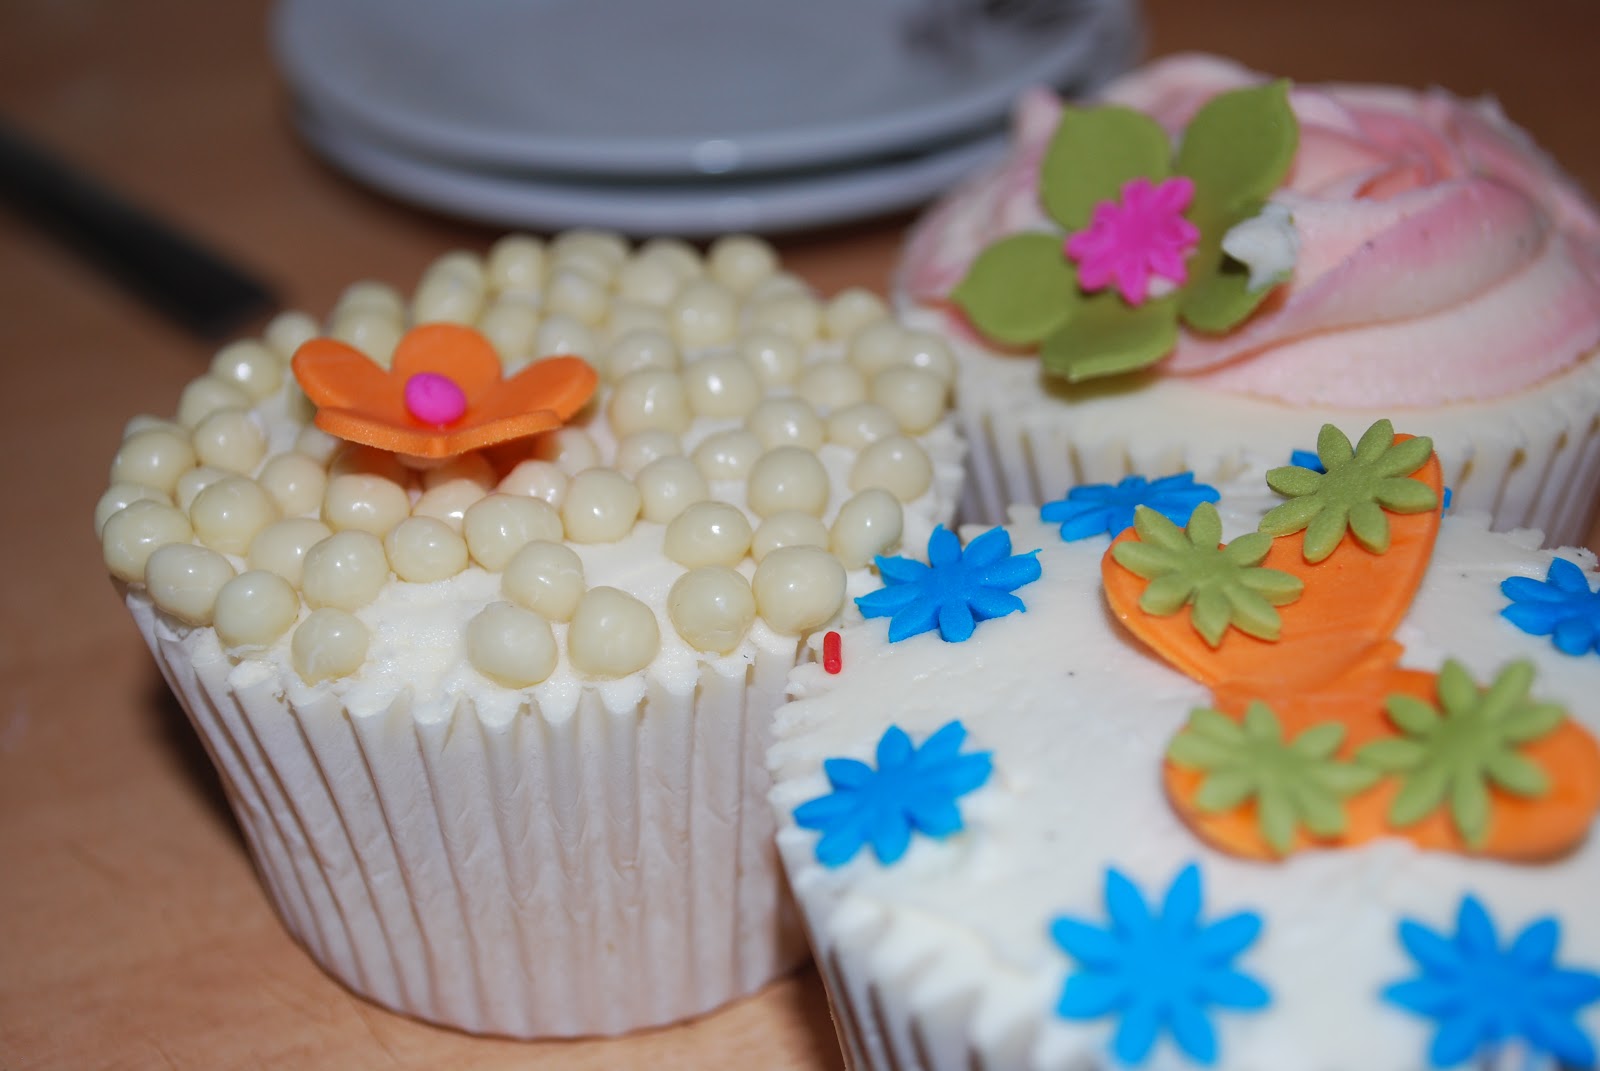
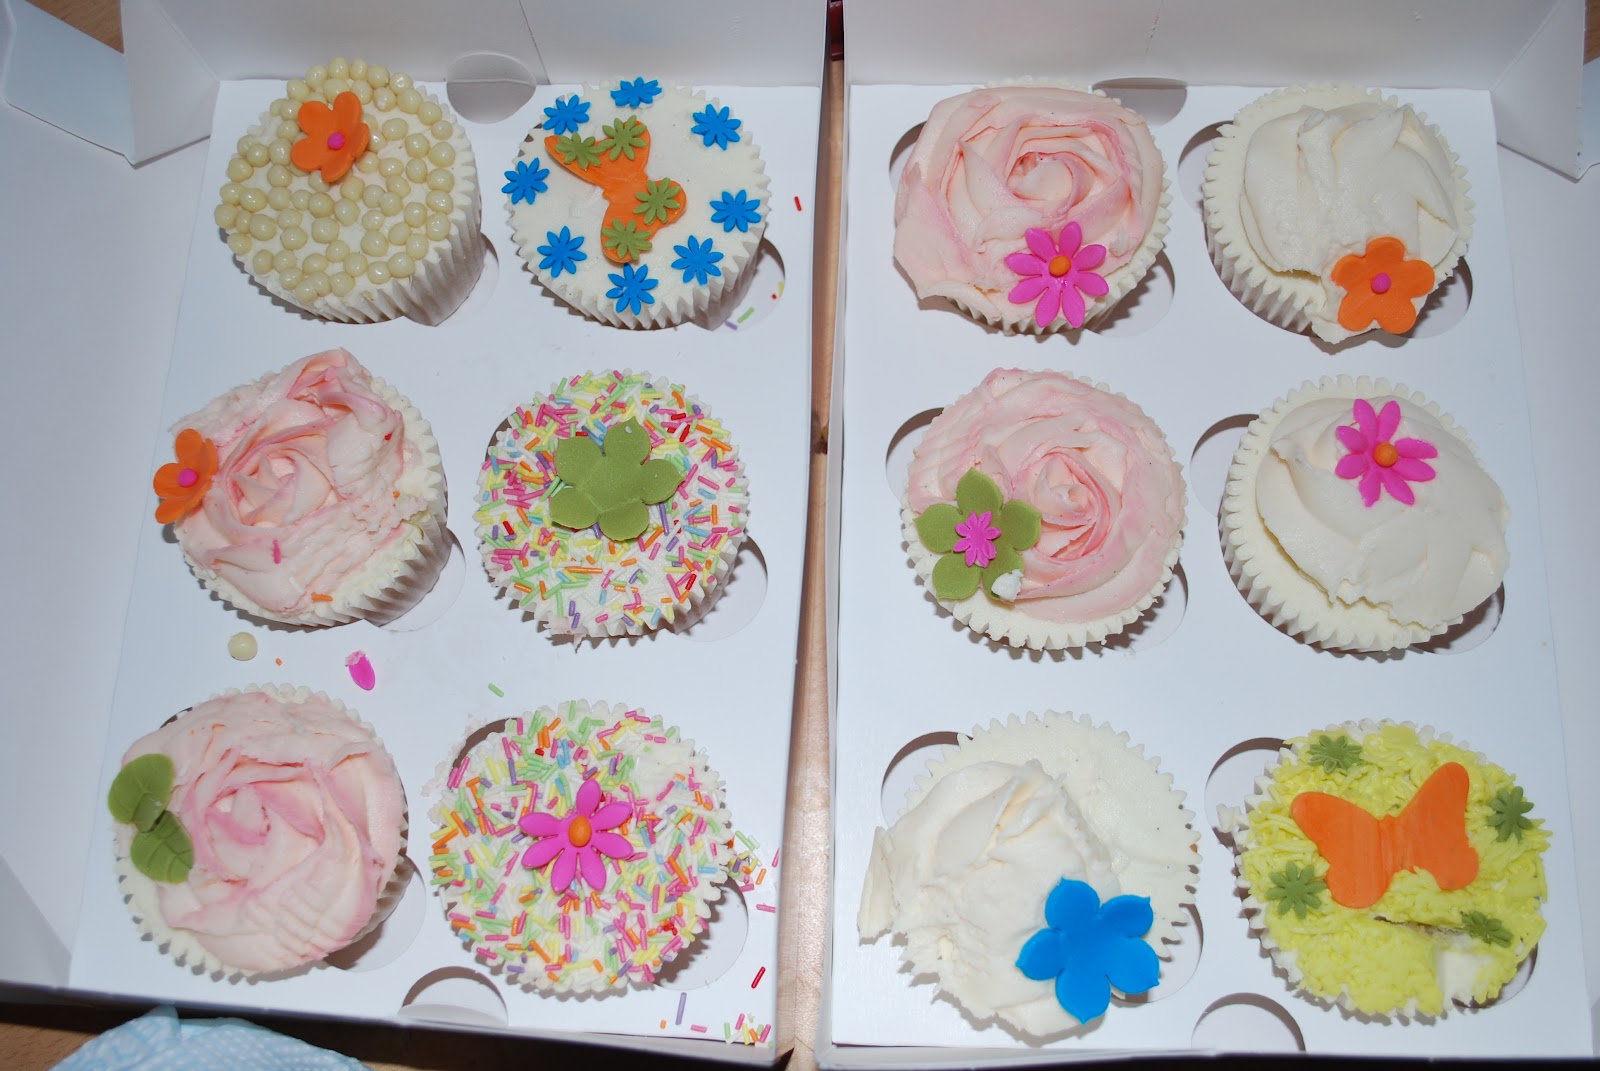
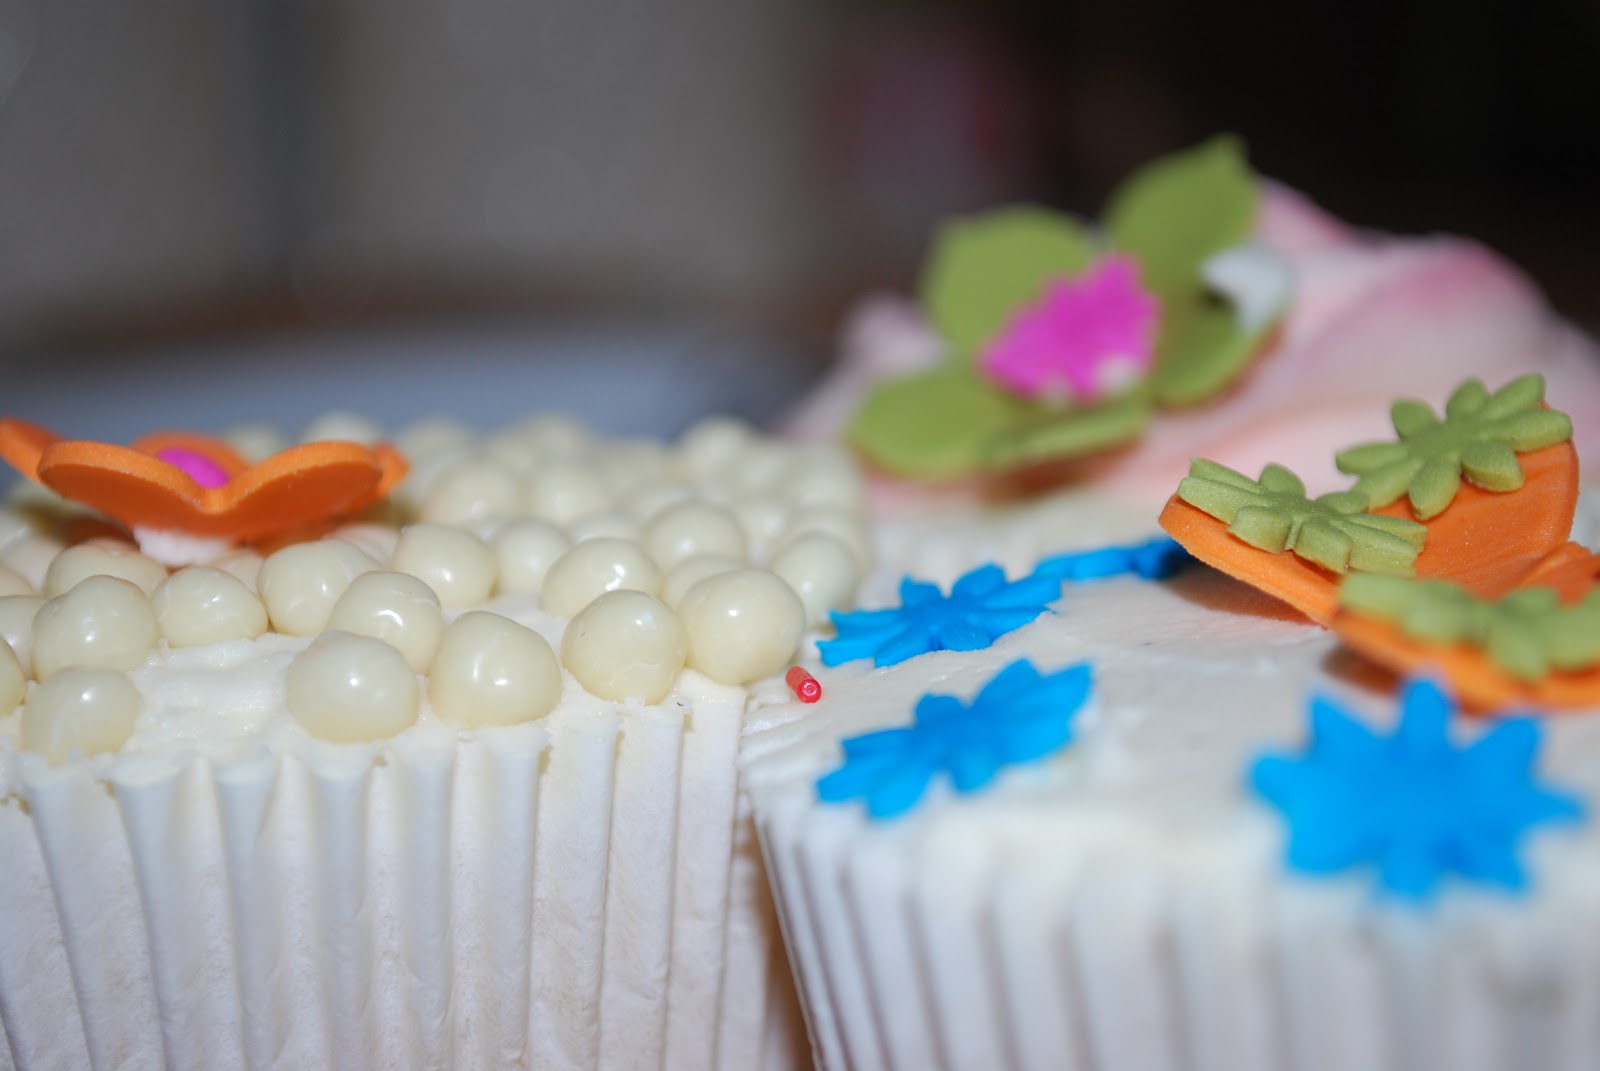
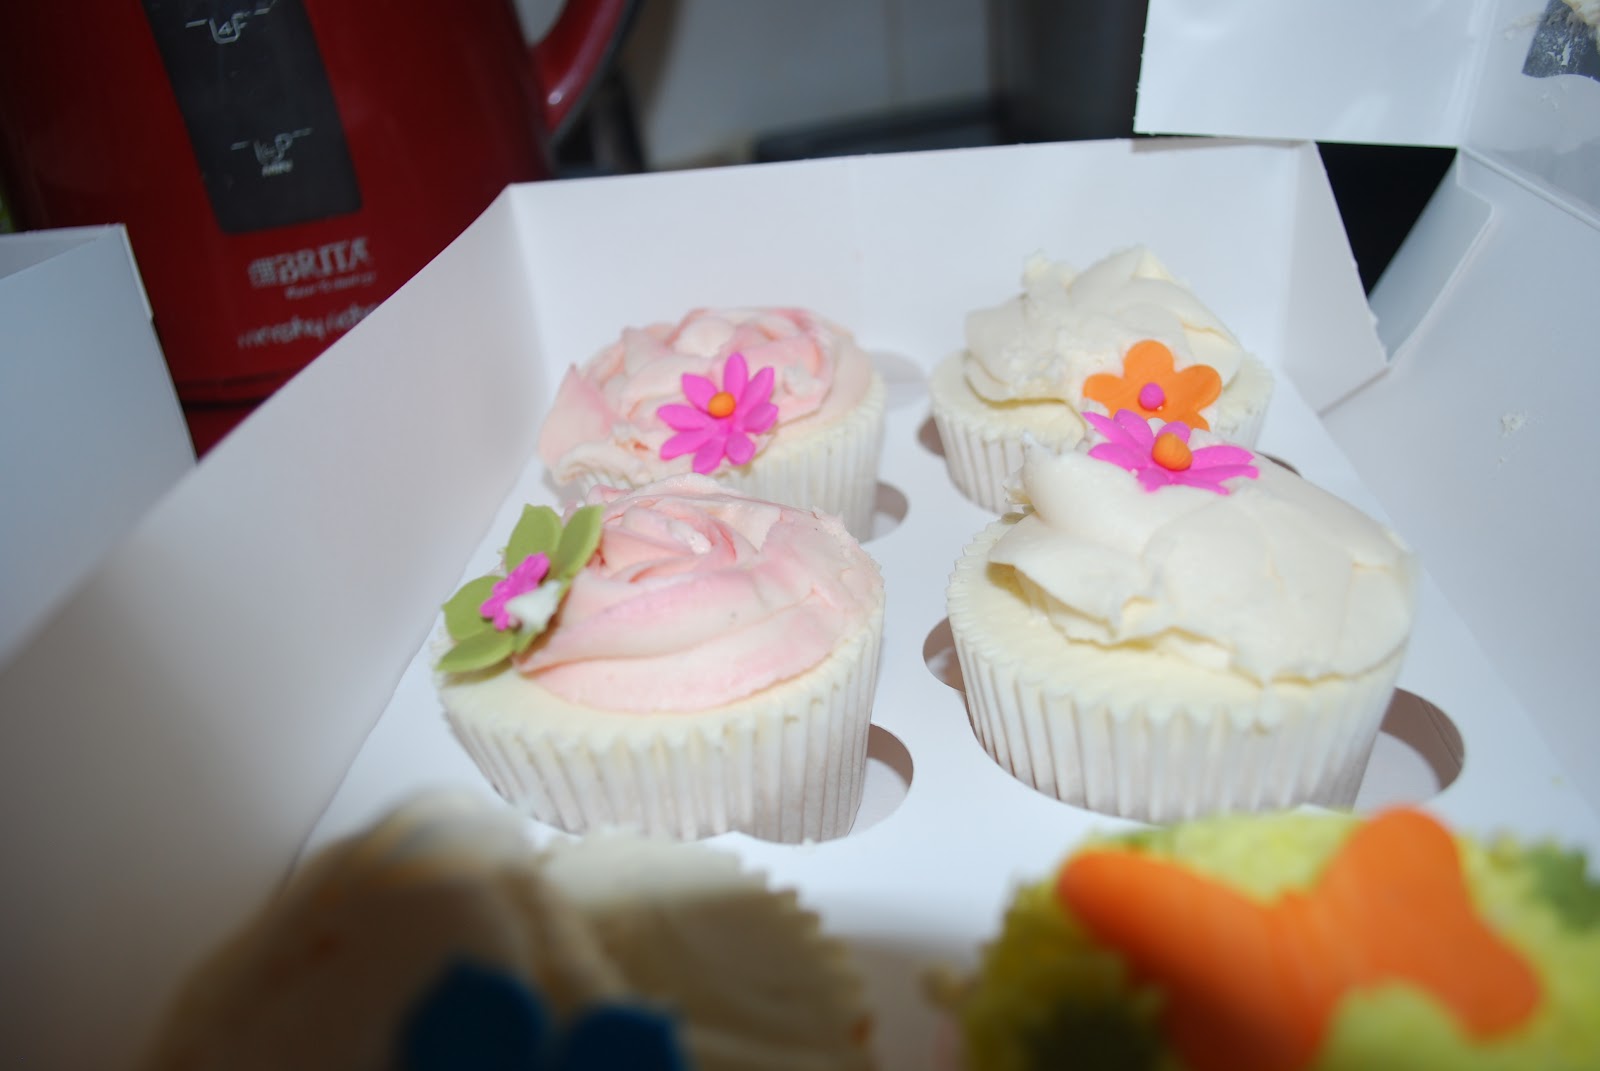
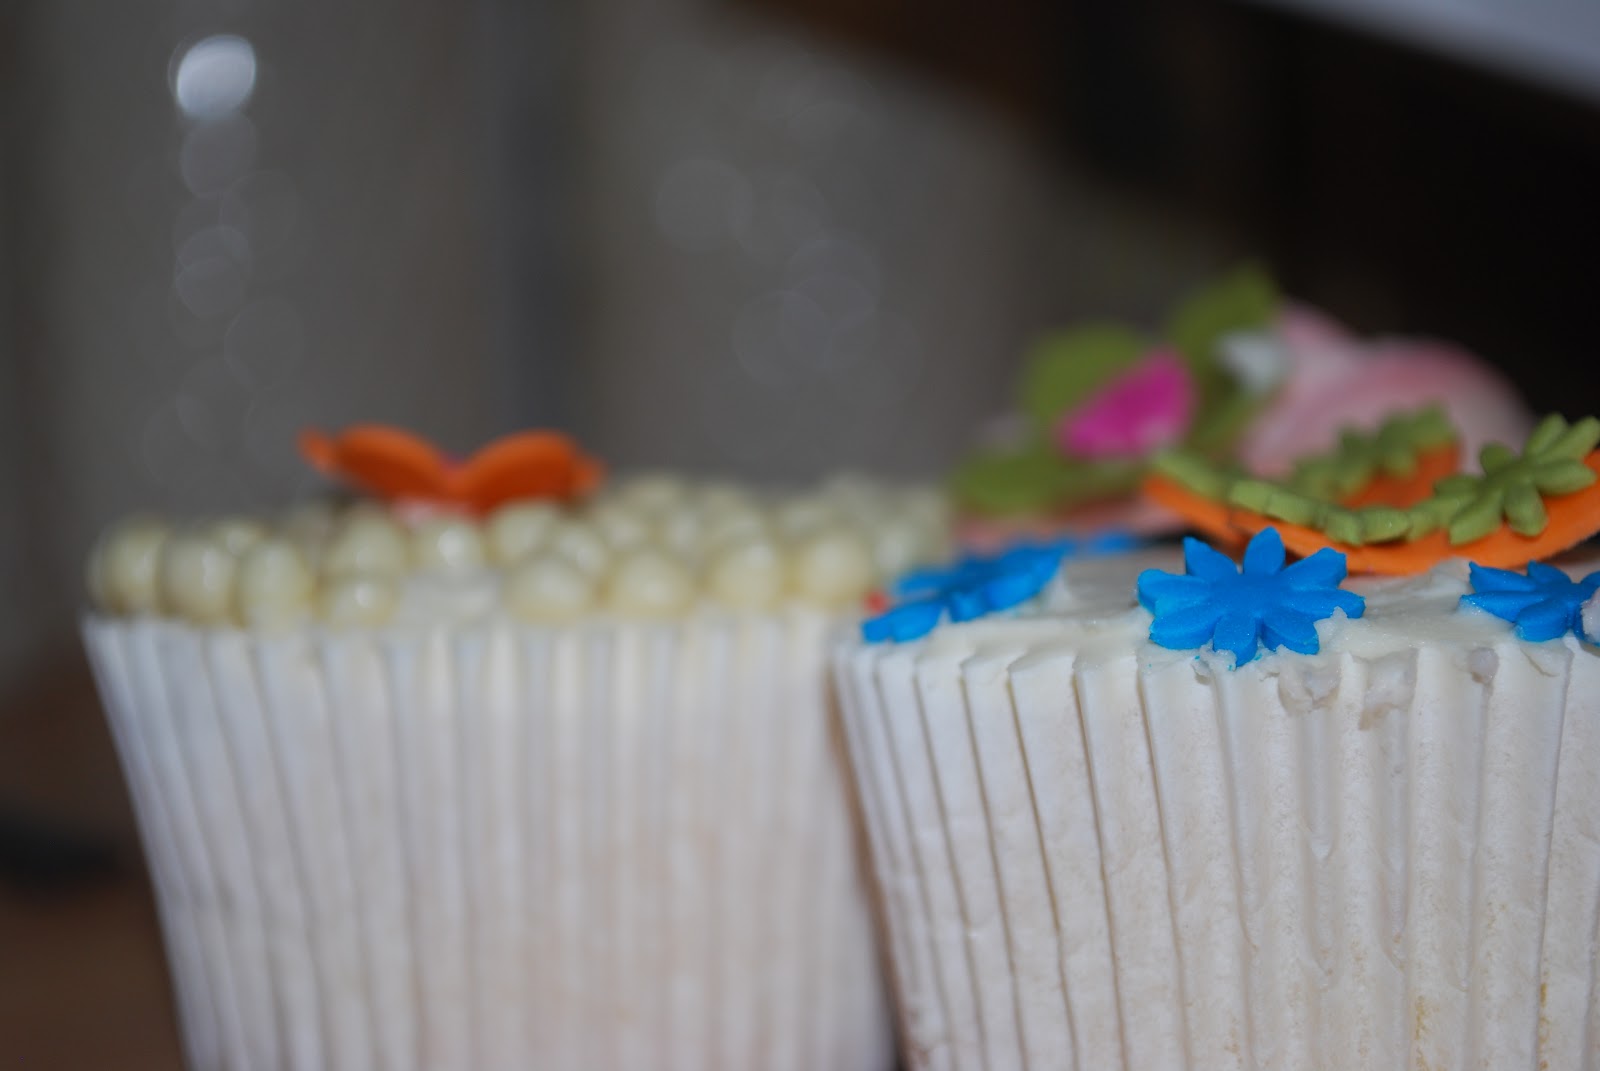
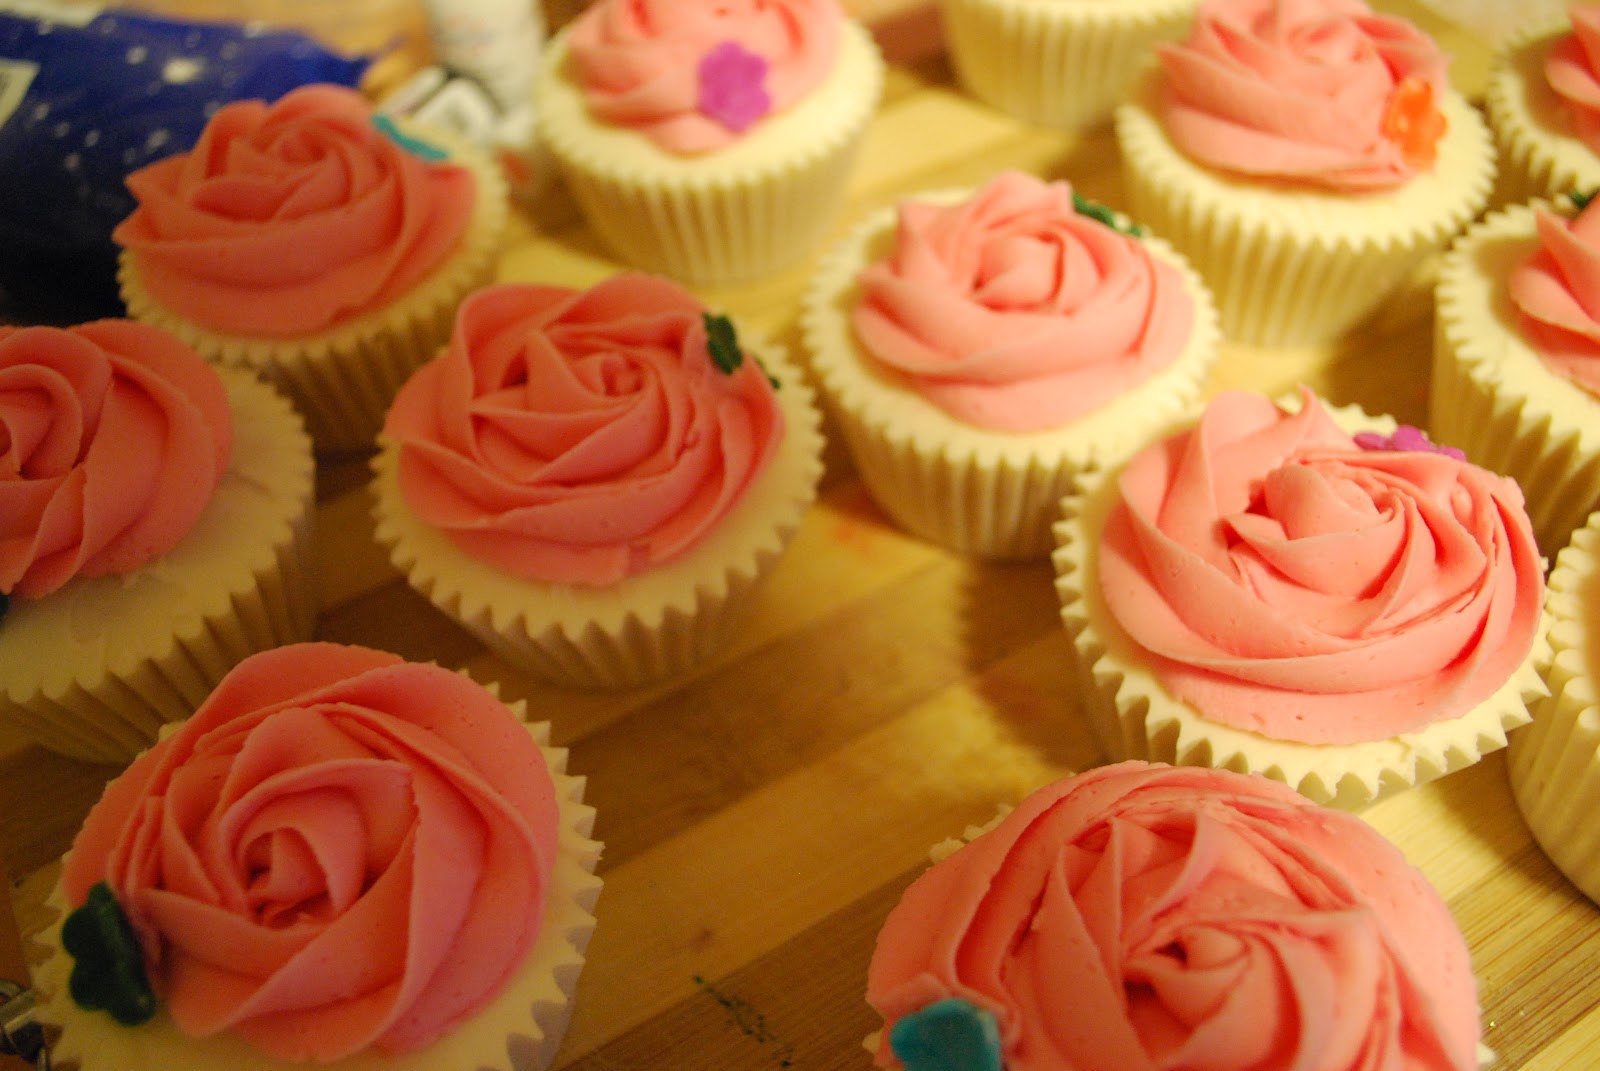
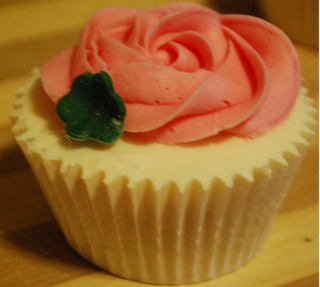
A fool proof vanilla sponge cupcake recipe that is light and moist and not too sugary. I have decided to scale the recipe down and give a couple variations of my cupcake recipe, just in case you you might want to make less than 24! I used fondant to make little sugar flowers to close the buttercream rose at the end.
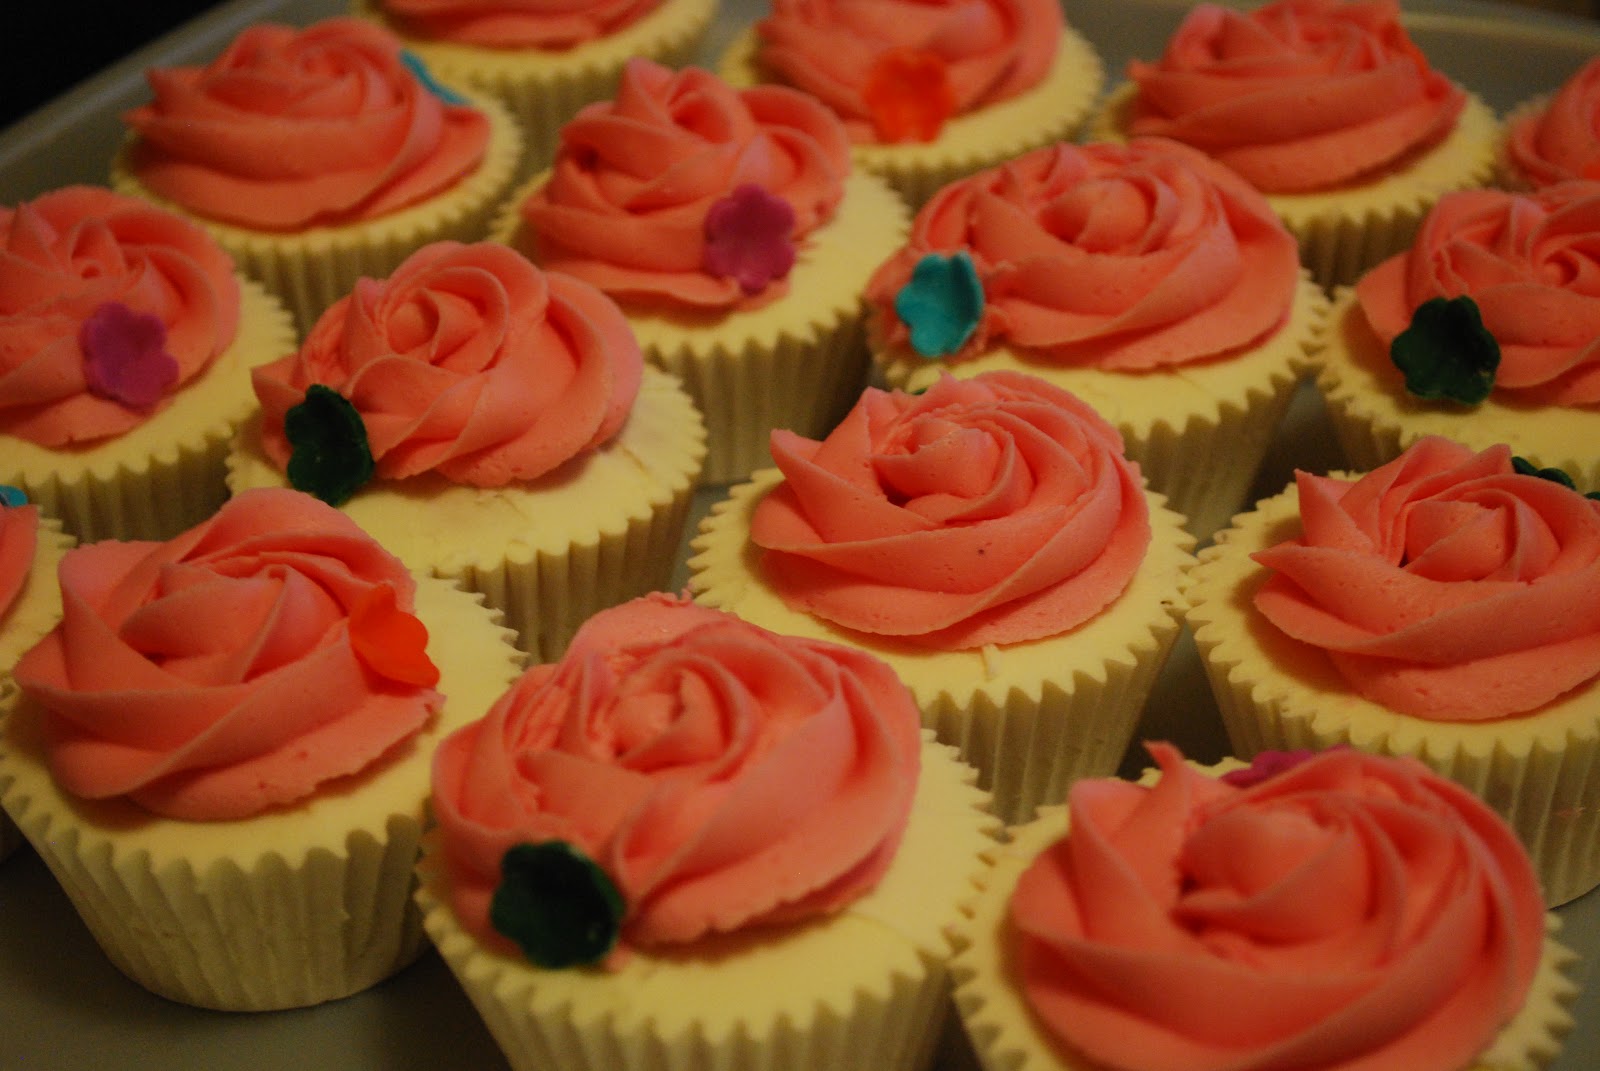
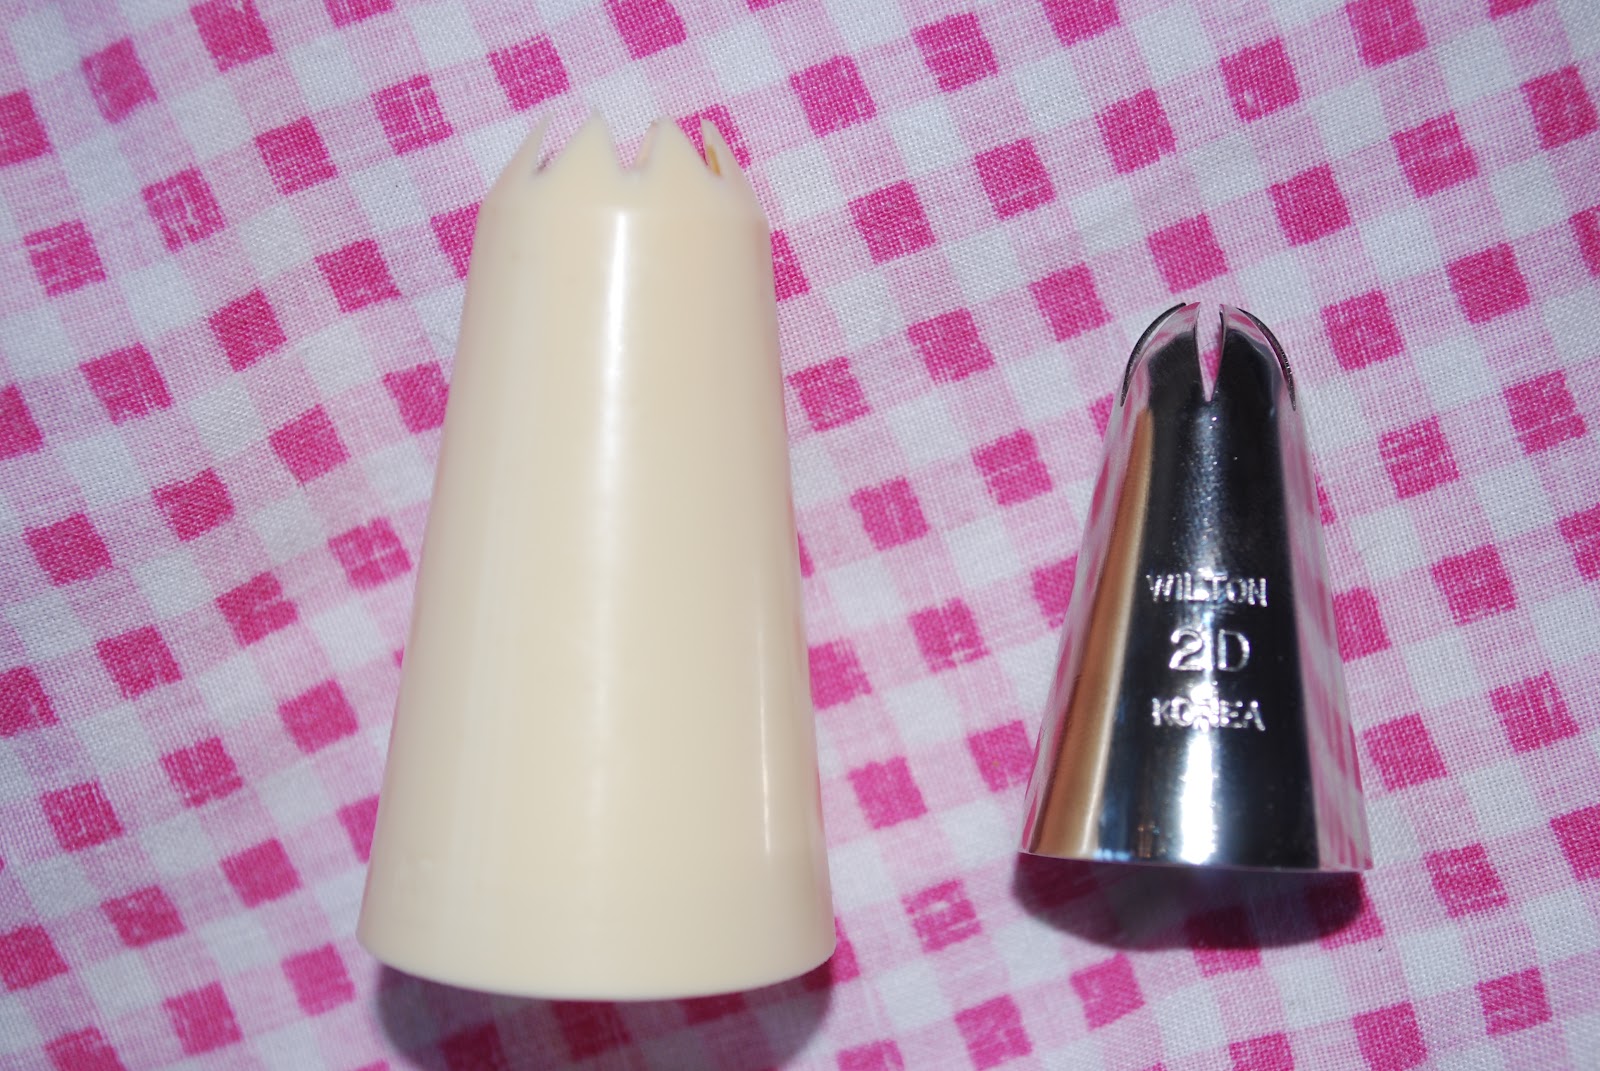
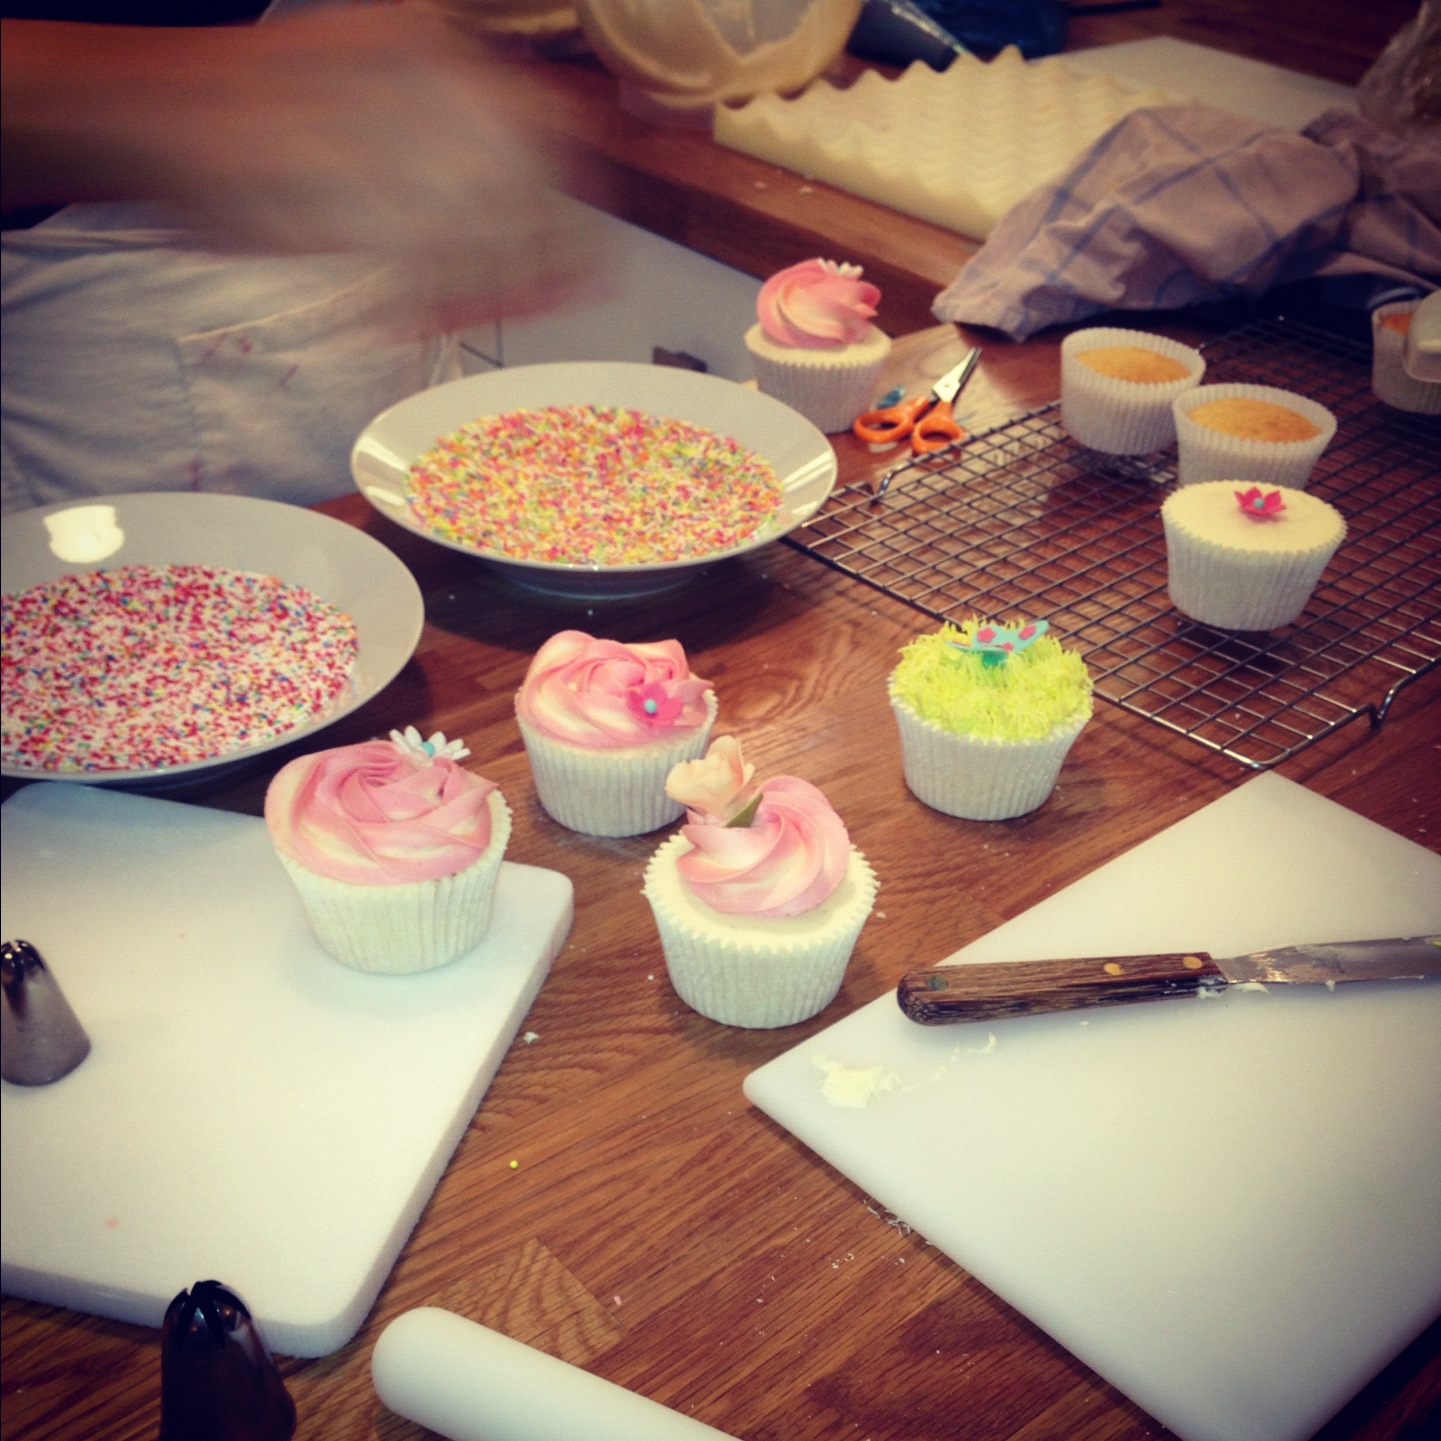
Rose Buttercream Swirls; Wilton 2D nozzle


Gold Edible Glitter
Makes 24 cupcakes
The Recipe(s):
210g Stork margarine 
220g caster sugar
4 medium eggs
2 tsp vanilla extract 
250 grams
cake flour
2 tsp baking powder
A dash of milk

Makes 12 cupcakes
100g Stork Margarine 
Half a cup caster sugar 
3 eggs
1 tsp vanilla extract
1 cup self raising flour 
1 tsp baking powder
Buttercream:
500g icing sugar
250g butter
2 tsp vanilla extract
A dash of milk
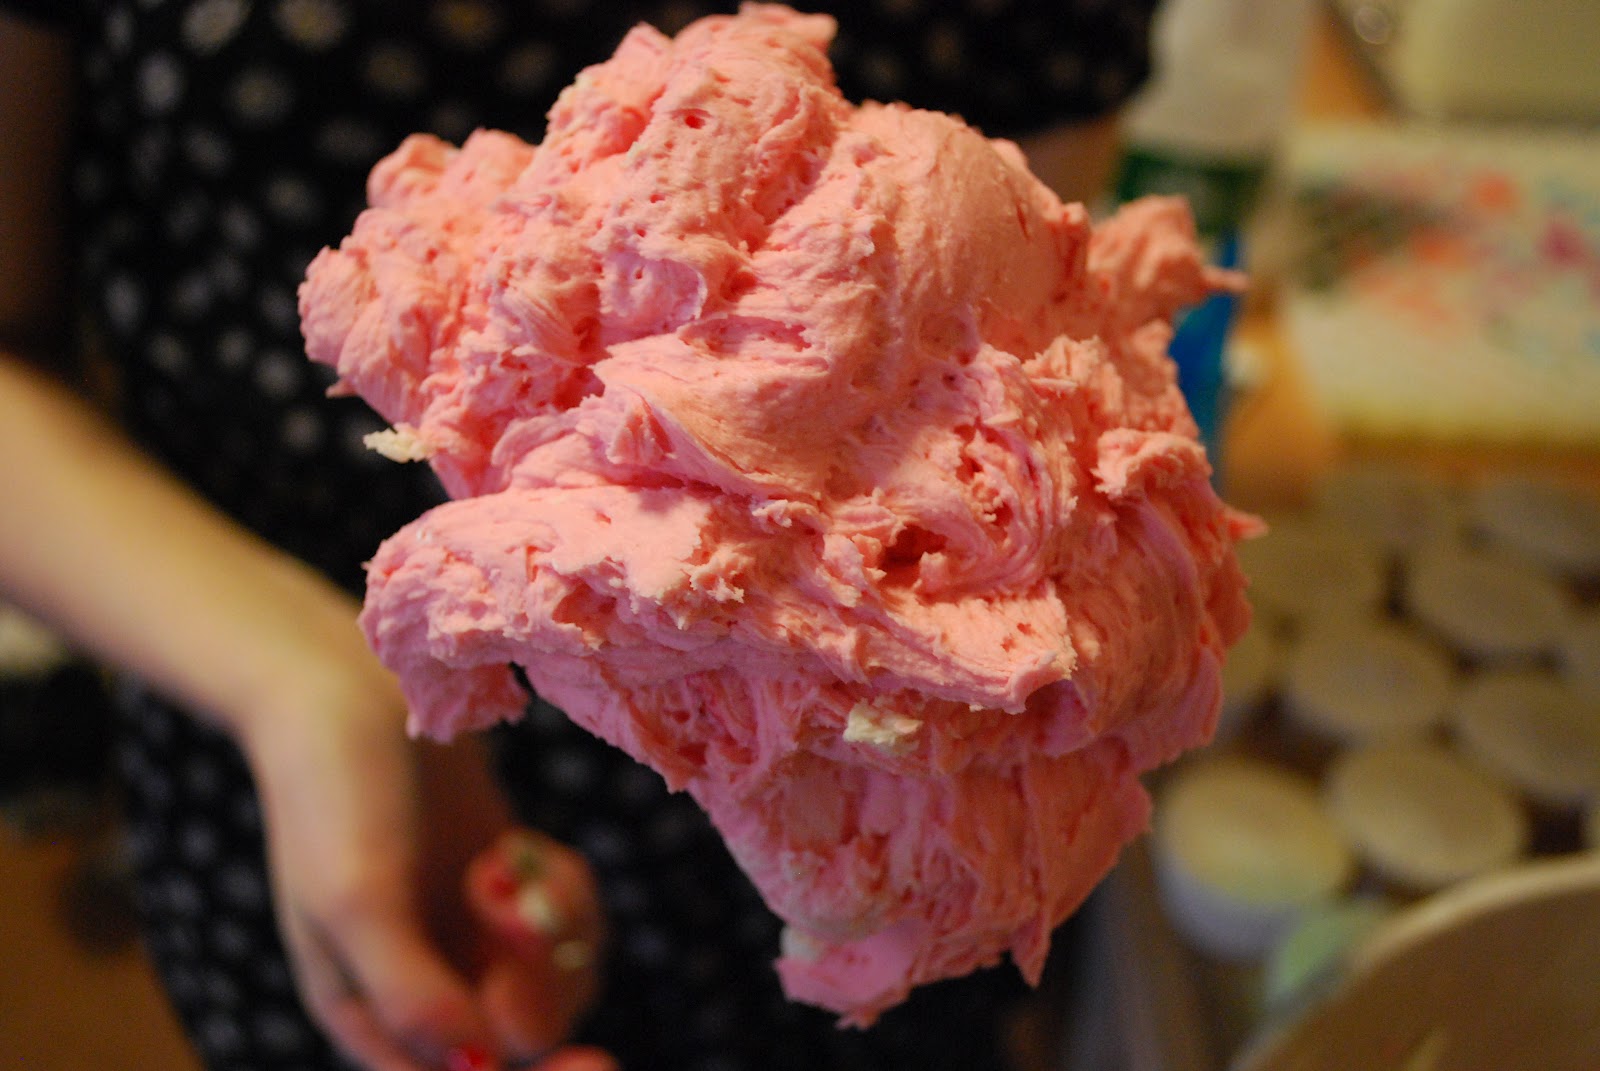
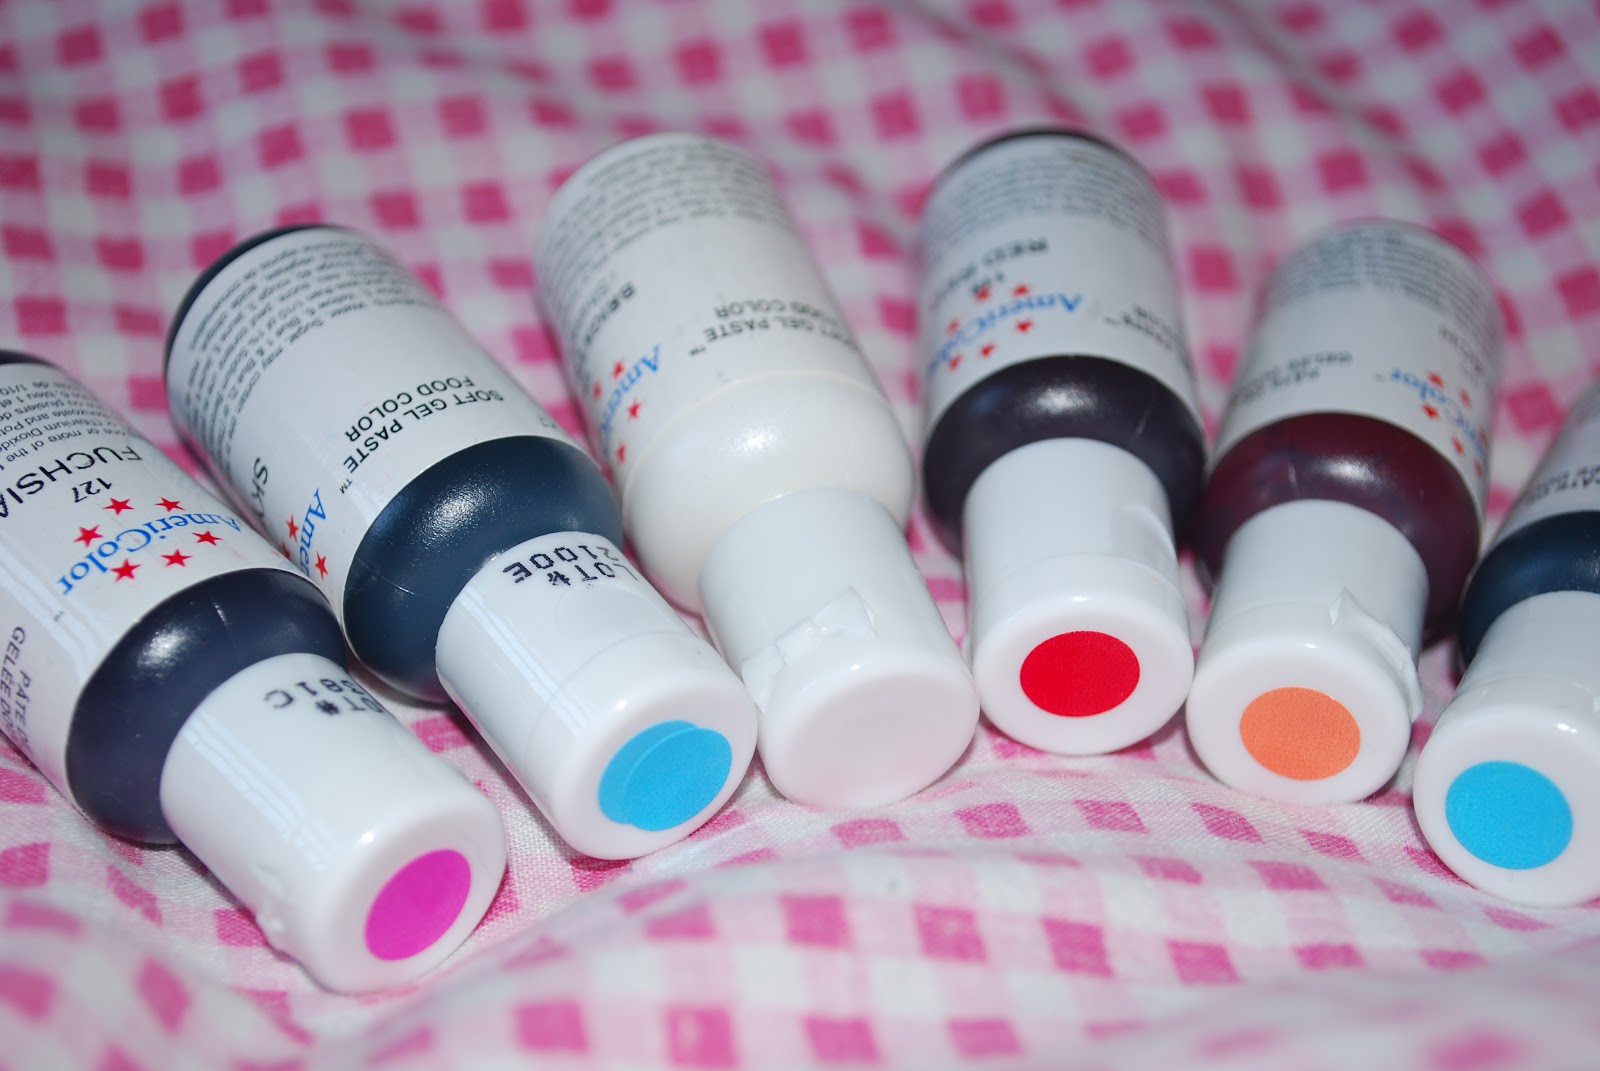
Americolor  Electric Pink Buttercream
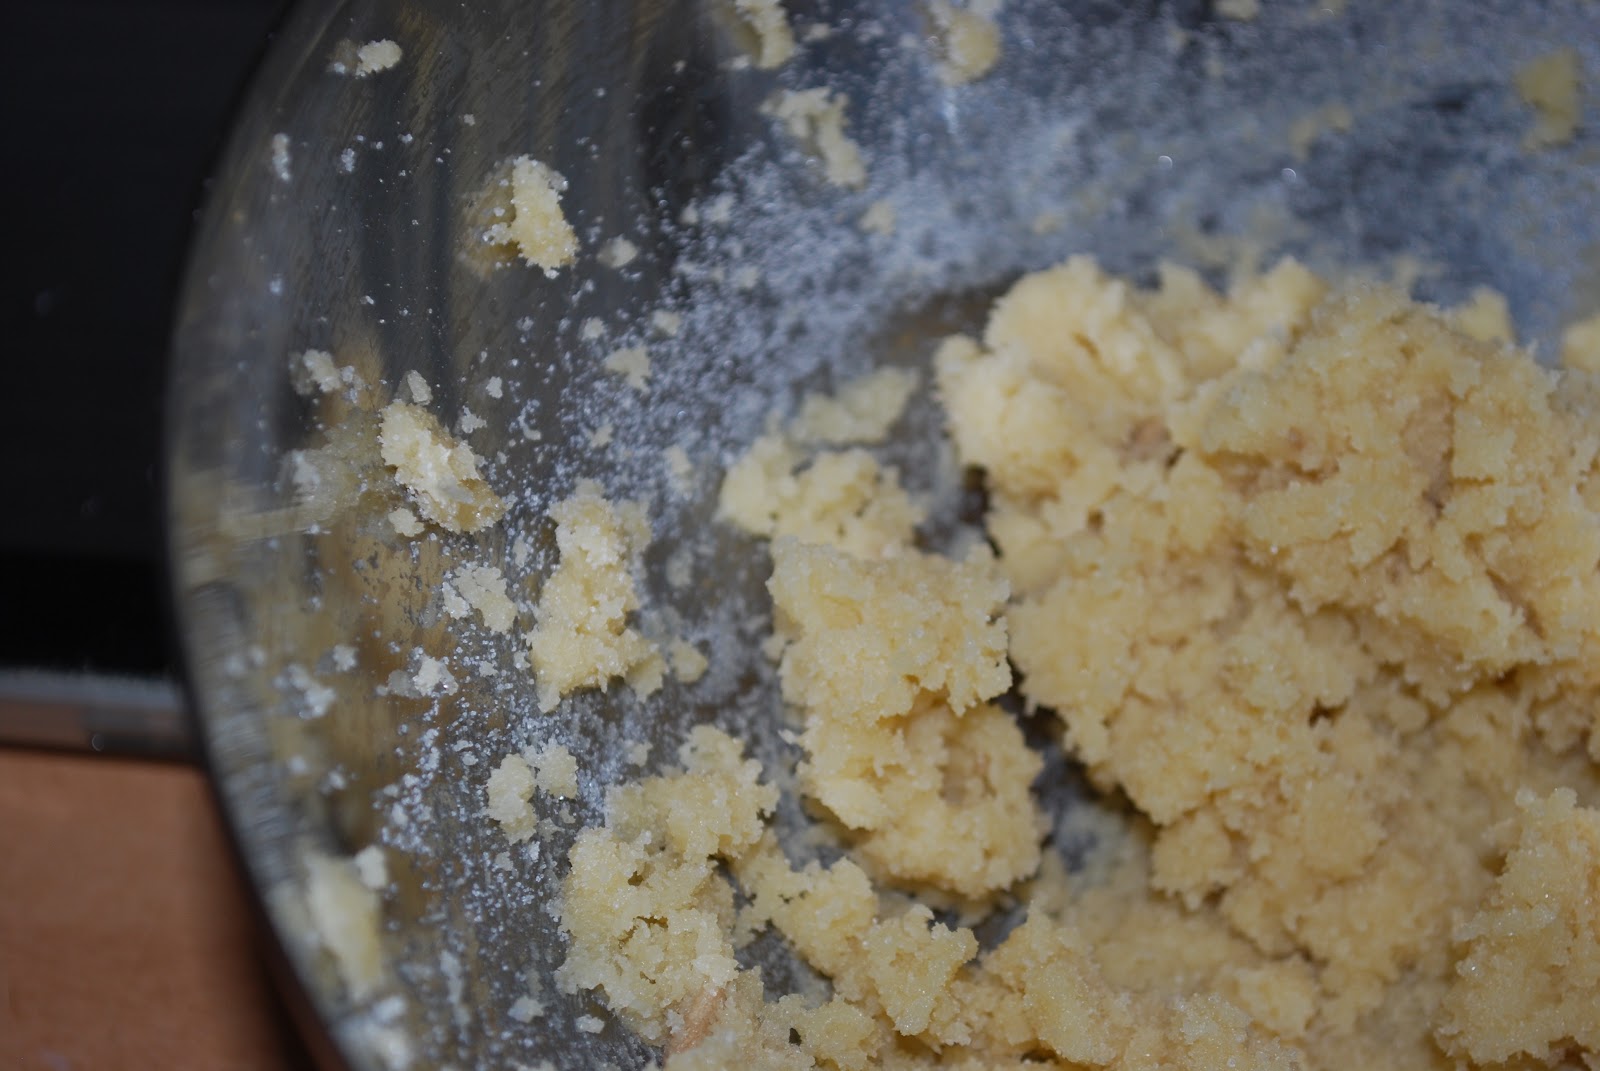
The method:
  • Preheat the oven to 150 degrees and make sure that all ingredients are at room temperature.
  • Whisk the margarine for exactly two minutes until fluffy. 
  • Add the sugar and beat again. 
  • Reducing your speed, add the eggs one at a time till you have a pale mixture. 
  • Incorporate vanilla extract.
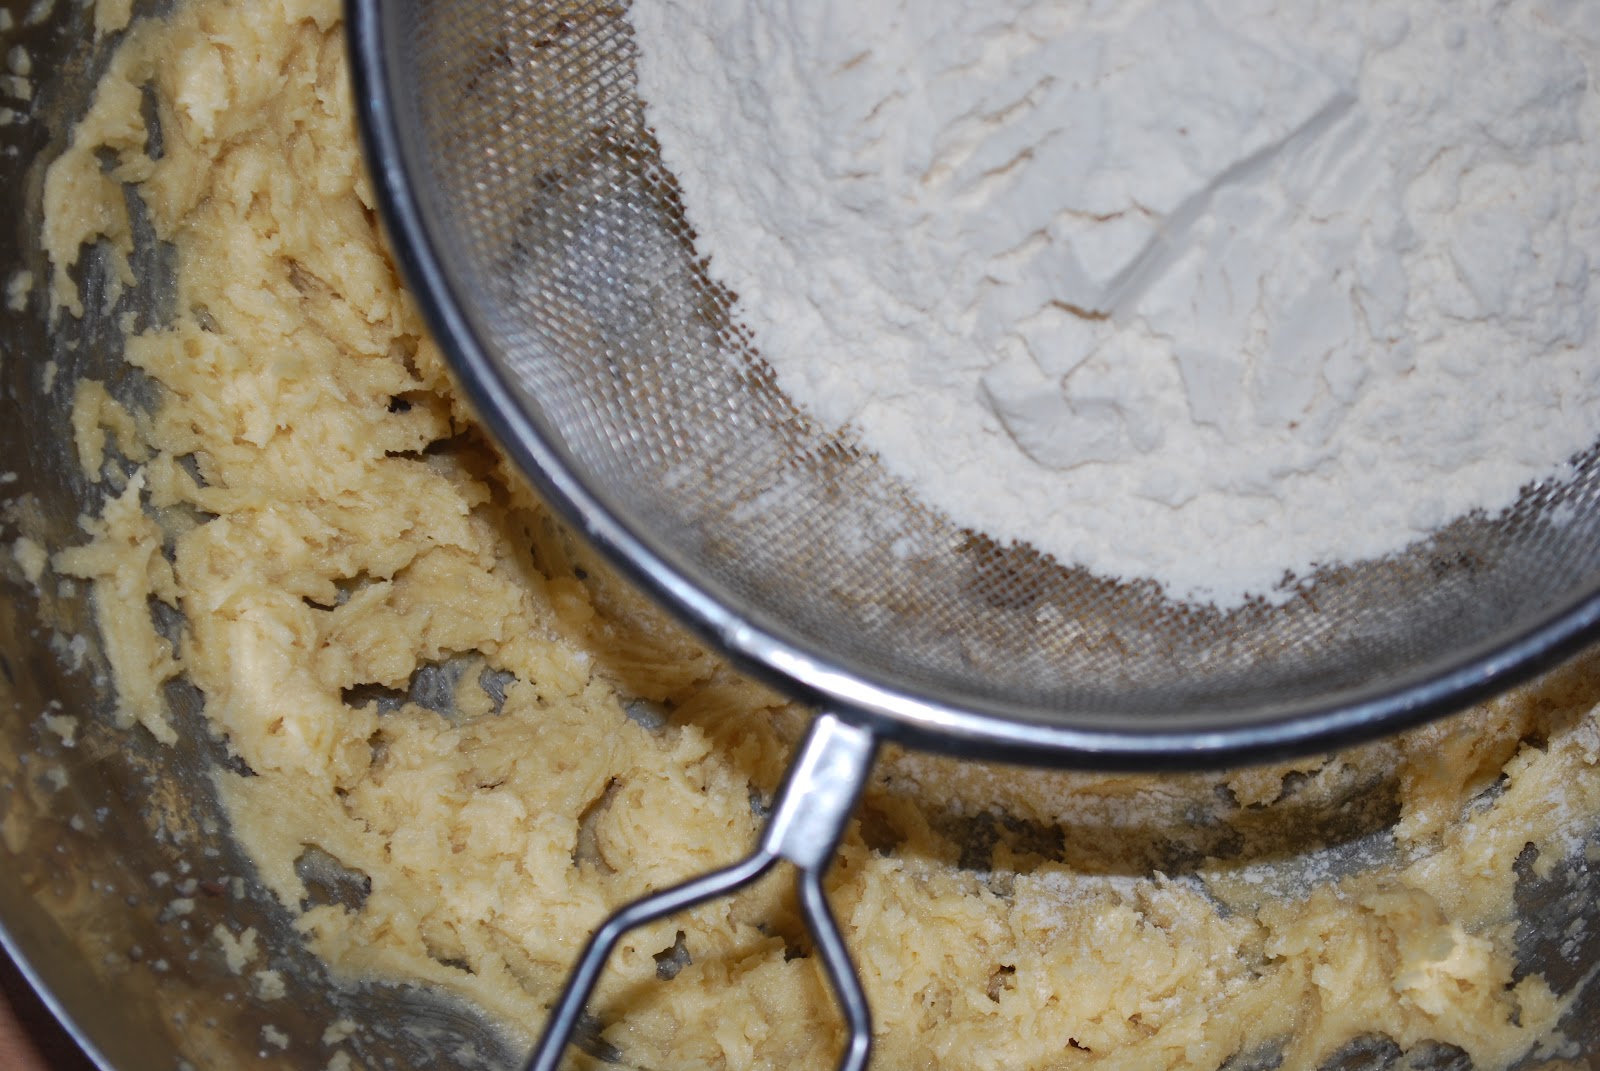
  • Using a mental spoon, fold in the baking powder and flour making sure not to beat too much as this creates a tough sponge.
  • Loosen the batter with some milk, no more than 3 tablespoons. 
  • Plop the mixture into cupcake cases until each is two thirds full. 
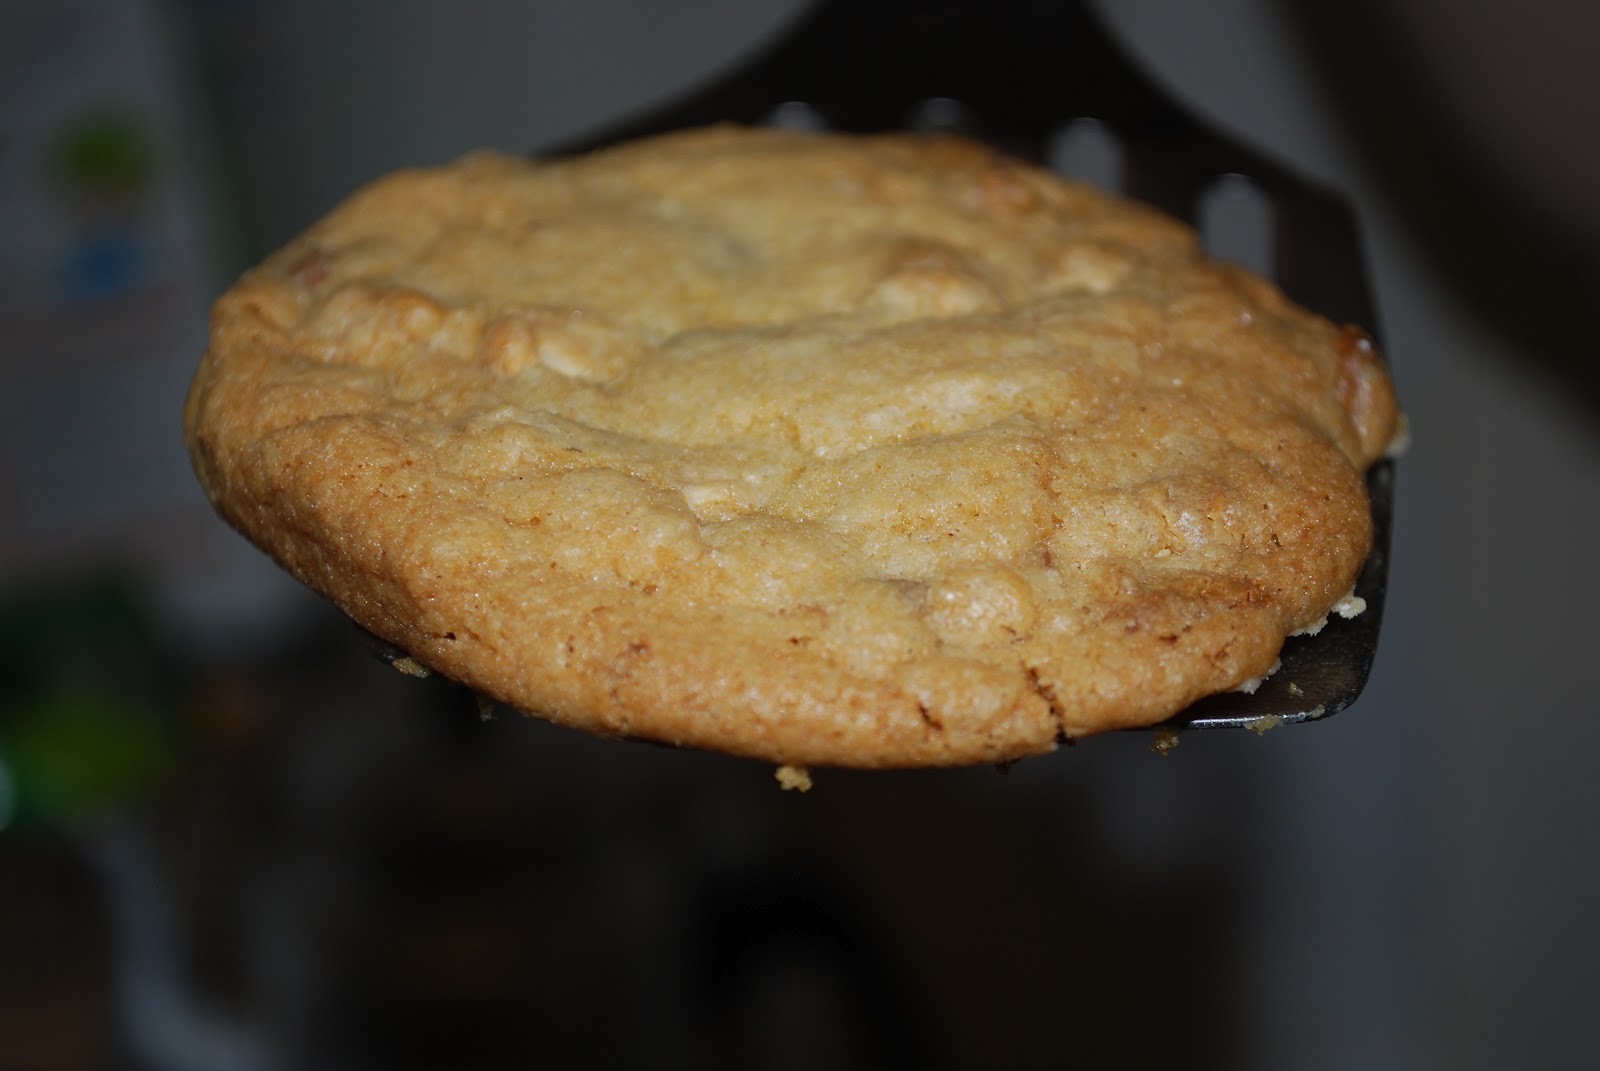
  • Bake for exactly 20 minutes.
  • For the buttercream, sift the icing sugar in a bowl. 
  • In a seperate bowl whisk the butter for two minutes. 
  • Slowly as all the icing sugar to the butter.
  • Now add the vanilla and some milk if too thick. 
  • Ice cakes once completely cooled. 

    Saturday, 25 February 2012

    Baking Essentials

    Americolors - For a vibrant coloured dessert. Be careful though, in the UK
    these are sold as 'non edible' as they contain E numbers not suitable within
    the EU regulations. But in my opinion they are edible and leave you
    with a great finish :)
    Here are just a few of the baking tools needed to create perfect cupcakes, cakes and desserts. There are also two other essentials not photographed that should also be used to create neat cakes - A drying foam pad which is used for small sugar creations and heavy duty piping bags for a tight and level grip!


    This is all pretty straightforward. But an oven thermometer is a definite must have if you want evenly baked products as a conventional even can be deceiving!


    Left: Star nozzle Right: Wilton 2d Rose nozzle

    Used in curry's, but just as good in cakes!


    Friday, 24 February 2012

    Cheats Caramel and Chocolate Ganache Tart

    A ridiculously easy recipe that tastes wonderfully sweet. There's no reason why you shouldn't try this one out because the recipe contains cheat after cheat after cheat after CHEAT. 

    The Recipe:
    1 pack ready made sweet shortcrust pastry
    1 tin carnation caramel or dulce de leche
    200g milk or dark chocolate
    60ml double cream

    The Method:
    • Roll out your ready to roll pastry on a floured surface and carefully crinkle into a fluted tart tin.
    • Place in a preheated oven for 20 minutes or until brown then leave to cool. 
    • Over a double boiler, melt the chocolate till consistently smooth.
    • Take the chocolate off the boiler and pour the cream on top then leave to rest in this state for 1 minute.
    • Now stir the cream with the chocolate until glossy. 
    • Spread all of the caramel onto the base of the pastry tin.
    • Once the ganache has cooled slightly, pour on top of the caramel and spread. 
    • Leave to set in the fridge for 1/2 hours.
    • Enjoy!

    Saturday, 18 February 2012

    Hummingbird Bakery Valentines Day


    For Valentine’s Day the boyfriend showered me in cake, in the non-literal sense. There was a beautiful Red Velvet Cake and a dozen Raspberry Cream Cheesecake Brownies, each tasted as consistent and delicious as the next and are all over half eaten at the moment (I got them yesterday). He ordered them from Hummingbird Bakery in London, and he definitely got in on point J


    On another note, the work of a dedicated & talented media reviewer can be found at http://relentlesslife.wordpress.com/

    Thursday, 16 February 2012

    Sea Woo & Macro Review

    Today I took a trip to Macro and Sea Woo in Charlton (South East London). If you’ve yet to experience Macro then envision it as a humungous warehouse full of stuff sold in multiples at a time, at reasonably cheap prices (until they include VAT at the till). The confectionary aisle is likened to that of a sweet heaven - towering shelves stacked with penny sweets, chocolate bars, pre easter - easter eggs, mints, nuts and pure indulgence. I didn’t buy much because I feared of triple weight gain in a matter of seconds. Anyway this is what I bought (see below) and I well can’t wait to rip it open and shower myself in this fine arse powder.

    Sea Woo is a Chinese supermarket, it was great in there! They sold anything from 100 frozen spring rolls for £1.80 (BARGAIN!!), to vacuumed pigs feet with the nail still firmly attached. It was wonderful, and we went a bit crazy and decided to buy loads of biscuity/creamy snacks. It was the brightly coloured packaging that lured us in.


    Wednesday, 15 February 2012

    Faircake Busy Baker Series: Cupcake Baking and Decorating

    This afternoon I had the pleasure of attending a 3 hour workshop taught by Shikhita in her very own cupcake related school/business called Faircake. She is based in the heart of Greenwich and her workshop has such an inspirational feel to it, Shikhita also adds humour to the class which makes it even more enjoyable! The lesson comprised of learning how to make little sugar fondant decorations, baking the cupcake itself and how to make a creamy, delicious frosting (with a few sneaky tricks and tips that she so gratefully shared with us). I thought I’d share some pictures of how my cupcakes turned out as the afternoon was fuelled with such fun and cheer, however as I left the workshop I found myself with a £40 parking fine…and then when I got home I stupidely stacked the boxes together at which they decided to fall straight onto their cupcakey faces…resulting in squashed cupcakes. Because of this awful misfortune I have only photographed the ones that were ever so slightly ruined! You can book classes on her website (www.faircake.co.uk) and I strongly recommend you do if you’re interested in learning the art of baking these little treasures. 

    Friday, 10 February 2012

    Chocolate Chip Cookies

    An added simpleton to the list of bakes on my blog! It doesn't matter though, because the taste of these cookies likened to that of a Marks & Spencer 'fresh out the oven' cookie from their in-store bakery (which they have in every store, in every Marks & Spencer across the UK). They were crumbly around the edges and had so much chew to their bite. I used a double quantity of chocolate chips - one milk and one white, this meant that they not only had that 'chocolate chip' taste but they also held that sweet and kind of new white chocolate cookie taste that is not so familiar to the cookie fanatic. 
    The recipe is like every other, with a few changes and increased quantities  so try it out whilst i jump on a plane to Ireland and have my first alcoholic beverage in the air. I asked my boyfriend why you get drunk on a plane easier earlier, he replied with "high altitude". What a geek. 
    The Recipe (make most of this one with american cups)
    2 cups plain flour
    Half tsp baking soda
    Half tsp salt
    180g butter 
    1 tbsp vanilla 
    1 cup soft brown sugar
    1 egg 
    1 egg yolk
    Half cup granulated sugar
    200g chocolate chips

    The Method:
    • Preheat the oven to 170 degrees. 
    • In one bowl sift together the flour, bicard and salt.
    • In another bowl cream together all of the sugars and butter.
    • Now beat in the vanilla and both the egg and egg yolk until light and fluffy. 
    • Mix in the egg flour mixture until just blended.
    • Pour in the chocolate chips until just incorporated. 
    • Using a cup, evenly drop the dough onto baking trays at least 2 inches apart depending on the size. 
    • Bake for 15 minutes.

    Thursday, 9 February 2012

    Off to Dublin, Ireland

    Tomorrow morning! Coming home Monday afternoon, cannot wait to try out some French and Italian restaurants. Will be coming home with a list/review of my favourites. Come back to this blog next week if you want to find out where to eat in Dublin :)

    ____________________________________________________________________________________________
    Saturday, 18 February 2012


    Ireland is an expensive city, they made a huge mistake when they gave in to the euro and this consequently affected my choice in food whilst there (that and a hint of bone idle-ness). The hotel food was especially deceiving; I ordered a tomato and mozzarella Panini in hope that the cheese would come from a buffalo. Instead I got soggy tomatoes and pre grated mozzarella of the ‘mild cheese’ kind AND crinkled CRISPS on the side???? They also have their very own imitation of our franchise known as Ed’s Diner - it gave me the shits. Also their Primark is called Penneys. But I had a hilarious time and poured by own pint at the Guinness factory! Happy birthday Lucy!


    Tuesday, 7 February 2012

    NSP Cafe Review Old Street, London

    Shoreditch area in London tends to lack in cheap grub. Its all about proper italian coffee and proper baguettes, made from the finest of everything carrying prices for only the 'finest'. But if you're ever in north London and fancy something cheap and cheerful, with the effort put into it that you're paying for, then a small road off Old street called Drysdale Street, will offer just that. This cafe still serves Italian brew, but it is at under half the price. Chips, burgers - grease how they like it on a building site. It may seem odd to post about a small business like this, but in some ways it serves as a niche to the boutique style of this side of North London. You don't get much of this here.

    Monday, 6 February 2012

    Cadbury Chocolate Mousse

    Foodie’s. They are automatically compelled into a world of expensive high quality produce, if its not organic, bin it. If you’re striving for brilliant recipes that work well every time then of course, go by this instinct! Recipe books constantly tell us that 70% cocoa will leave your finished product tasting rich and beautiful, anything less will simply NOT give as good results.
    My moto is different. Unless I’m making a sponge, I see no reason to use such a bitter cocoa solid in my frostings, mousses, ganaches or even just as a simple snack on its own. I don’t think I speak for myself when I say (as a lady, of course) that milk chocolate is delicious, it’s creamy, it’s smooth and its sweet. All four attributes are what I look for in a good quality chocolate; I do not look for the cocoa percentile in order for my desserts to taste at their best. However, taste is subjective…so I say only use this poncy dark chocolate stuff if your taste buds genuinely enjoy that almost alcoholic ‘squirm whilst you chew’ taste.
    Below can be described as none other than a commercial recipe, Cadbury’s was not my first choice in chocolate, especially for a mousse, but it snowed in London this weekend so my car was off bounds meaning my only source of shopping came from the Belvedere Local a few minutes’ walk away, but even that was a struggle. I would recommend using a milk chocolate of a different brand, preferably a baking brand as this will ensure a ‘mousey’ texture because it does not contain as many additives. 
    The recipe
    1 bar of milk chocolate 
    2 egg whites 
    2 tbsp water 

    The method
    • Melt the chocolate and water over a ban marie until glossy and then take off the heat
    • In a bowl, whisk the egg whites until stiff peaks.
    • Fold the egg whites into the chocolate using a figure of eight until you have a thick and creamy, aired up mixture.
    • Divide the mixture into four pretty glasses and refrigerate for 2 hours.
    • Serve. 

      Sunday, 5 February 2012

      Super Simple No Bake Chocolate Cornflake Cupcakes

      For a large portion of us, stress relief has forever moulded itself in the form of baking. The price of baking is also forever increasing, and how often we are stressed out is also…forever increasing. If you’re one of these people then you will know that sometimes it’s impossible to whittle down your stress in this therapeutic way, and thus your stress will continue to escalate.

      But where there’s a will there’s a way. The answer is of course, cheap baking! It’s not fancy to say the least, but a few simple ingredients can end up tasting so scrumptious together and when you’re piecing the product together, it still manages to de-stress you!

      My cheap de-stressing mechanism comes in a childish form. Chocolate Crispies! There’s absolutely no point providing a recipe but I like to use half a box of Kellogg’s cornflakes, 1 bar of milk chocolate and 1 bar of white chocolate, melted and mixed in with the cornflakes. Obviously if you’re willing to splash the cash then adding white chocolate chips once the mixture has cooled slightly gives it even more of a chocolatey kick! Also, melting the chocolate over a bain-marie (double boiler) 100% ensures that it will not burn!  


      Love Em xx

      Amatuer Macarons


      These French darlings are supposedly to die for - my first attempt was far from this. In fact they resemble a rotting red blood cell. My macaroons look like they are more suited to the post living... After having a go at it, the method itself was quite simple! However the piping was a challenge, hence the amateur-esque rusky look i've got going on here. The macaroons had a deep almond flavour, the texture was tender yet chewy and this recipe helped balance the orgenolaptics of a macaroon perfectly. But if i were to try these devils again i'd  use a different filling - and i'd make double sure that said filling does not curdle! 

      The Recipe
      175g icing sugar
      125g ground almonds
      75g caster sugar
      Food colouring
      Filling
      150g icing sugar
      75g butter
      1 tbsp milk
      Food colouring

      The Method
      • Preheat oven to 160 degrees
      • In a food processor blend together the ground almonds and icing sugar to a very fine dust and then sift into a bowl 
      • In another bowl whisk the egg whites with a pinch of salt until you have soft peaks
      • Gradually add the caster sugar until glossy
      • Fold half the almond mixture into the egg whites using the figure of eight. Add the second half and do the same until you have a thick and smooth mixture 
      • Spoon mixture into a piping bag and pipe out 5cm rounds onto baking tray with baking paper on it
      • Let the rounds rest for 15 minutes so that they form a film
      • Bake for 15 minutes and let cool
      • Cream butter, food colouring and milk together in a bowl
      • Gradually add sifted icing sugar to the mixture until smooth
      • Plop a spoonful of buttercream onto a macaroon and then place another on top
        TU8W9D3HGZKQ 

        Thursday, 2 February 2012

        Chocolate Peanut Butter Cake

        Usually when i bake a sponge cake i find it very difficult to truly enjoy the buttercream/frosting, for some reason it always tastes better when bought from a specialist bakery (without sarcasm, i wonder why). When you make it at home it always tastes too rich, to the point where you find it difficult to suck the cake off until there's none left. 

        This recipe excited me. Both the peanut buttercream and chocolate ganache (with a touch of peanut butter included) were so damn good and just downright eatable. This is a rarity in my kitchen when it boils down to frosting. There are so many positive attributes to this triple layer delight that my brain is unable to reiterate them into typed words.

        This is an American adaptation from the Smitten Kitchen, i spent hours converting cups to grams and was surprised to get it on point - especially when i discovered that cups vary according to the specific ingredient.  

        A moist sponge, coated in a creamy buttercream with thick chocolate plopped on top. Go on, have a go. 


        The Recipe
        Sponge
        250g plan flour
        500g sugar
        94g cocoa
        2 tsp baking powder
        1 tsp salt
        236g/ml (it bears no difference) vegetable oil 
        230g/ml sour cream
        354g/ml water
        1 tsp salt
        2 tbsp white distilled malt vinegar 
        1 tsp vanilla extract
        2 eggs
        Peanut butter frosting
        284g cream cheese
        112g unsalted butter
        Icing sugar (use as much as you see fit, but do not exceed 500g)
        172g peanut butter (preferably Skippy's as it will not split)
        Ganache 
        227g milk chocolate or dark chocolate - depending on your preference 
        3 tbsp peanut butter 
        2 tbsp golden syrup
        125ml double cream
        The Method:
        • Preheat the oven to 170 degrees, grease and flour three cake tins. 
        • Sift flour, sugar, cocoa, baking powder and salt in a large bowl. Mix together till well incorporated. 
        • Measure out vegetable oil and sour cream and whisk in till you have a fudge like and grainy consistency.
        • Gradually add in all the water. Do not threat, the sponge is moist so the watery consistency is needed. 
        • Add in vinegar and vanilla extract. 
        • Whisk in the eggs and the pour into the pans. 
        • Bake for 30 minutes, and then cool in the pans before you turn them out. 
        • Place the cakes into the freezer whilst you prepare the frosting's, this makes for a firmer cake to work with whilst icing. 
        • On top of a double boiler melt the chocolate, syrup and peanut butter together. 
        • Off the boiler, mix in the cream till thick. Set aside. 
        • In another bowl, beat the cream cheese with the butter until creamy. 
        • Gradually add in the sugar and then the peanut butter. 
        • Take cakes out of freezer and frost the layers and sides - don't forget to begin with a crumb coat. 
        • Now pour the warm chocolate on top of the cake, use a spatula to create drips on the side.
        • Hey presto. 

        Template by Pink + Lola